The3Doodler is a hand-held 3D printer! The company is now taking orders. Last summer it was a "crowd-funded" Kickstarter project, and we invested in it. Our reward for sponsoring this clever invention was to receive our very own pre-production device in January. It is kind of a cross between a hot-glue gun and a 3D printer.
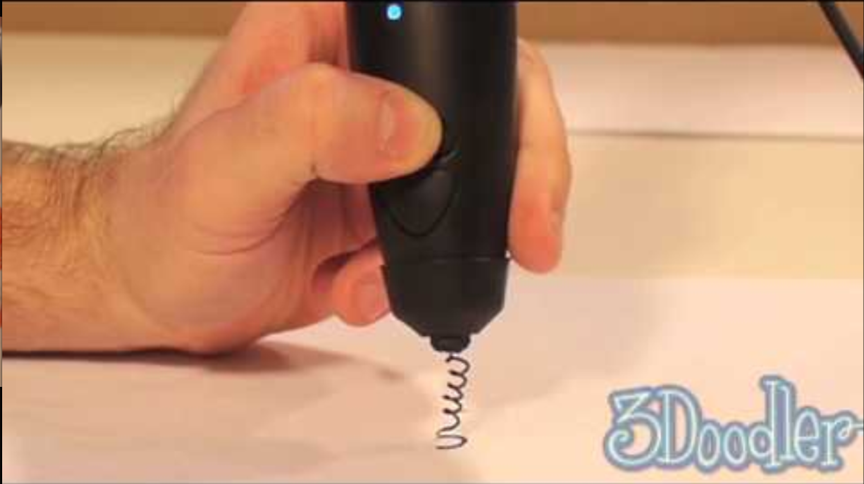
Unlike a glue-gun that melts a stick of rubbery plastic to glue things together, the 3Doodler can melt a 3mm filament of ABS (a kind of plastic that many things are made of) and extrudes it into a softened web-like thread that can draw up off of the paper in the open air and into almost any shape you can imagine. While it is intended to be used for making plastic objects by drawing 3-dimensional doodles, we use it primarily to fix plastic objects that have broken or to hack plastic things by adding features to them. But more about that in a later blog post.
Now we would like to tell you how the team of MacGyvrBot and Skip have found a way to make this great product even better!
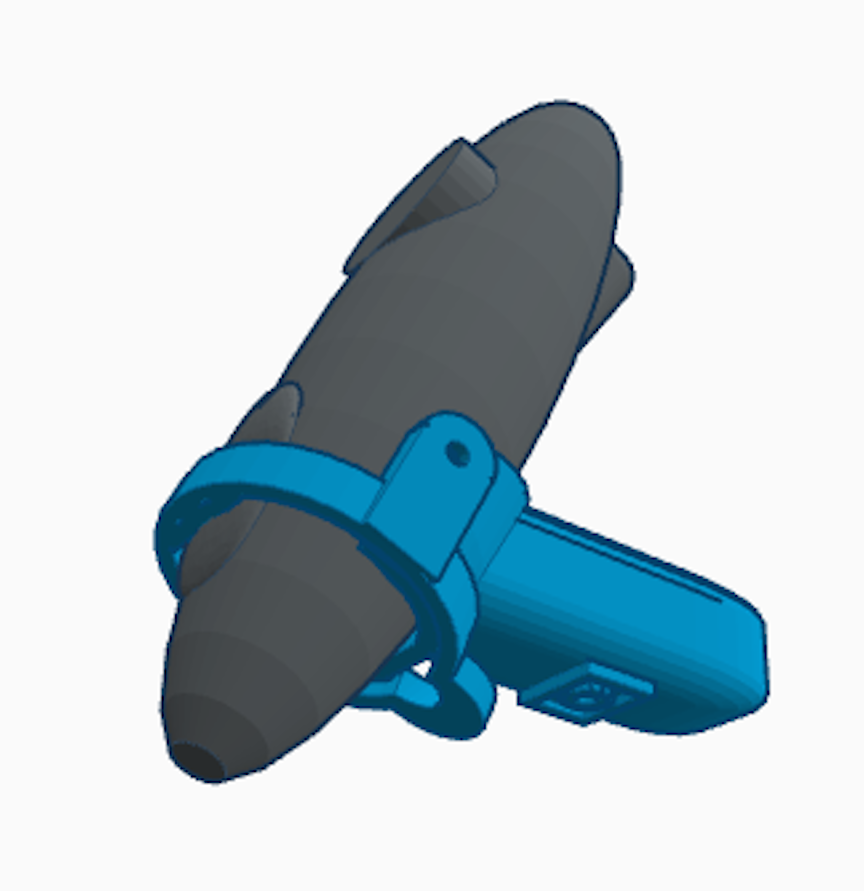
We used Tinkercad to hack-up a model for a Handle and Trigger mechanism, and then we published the design on Thingiverse so that anyone with access to a 3D printer can download the .stl files and make a Phaser Handle for 3Doodler of their own.
or you can just click these links to download the 3 files
This kind of sharing is called **open-source hardware design** and the practice allows people to build on each other's ideas. You can also use Tinkercad to copy this design and modify it with your own ideas. Progress is faster this way, so open-source design is the best way to get the most out of 3D printing.
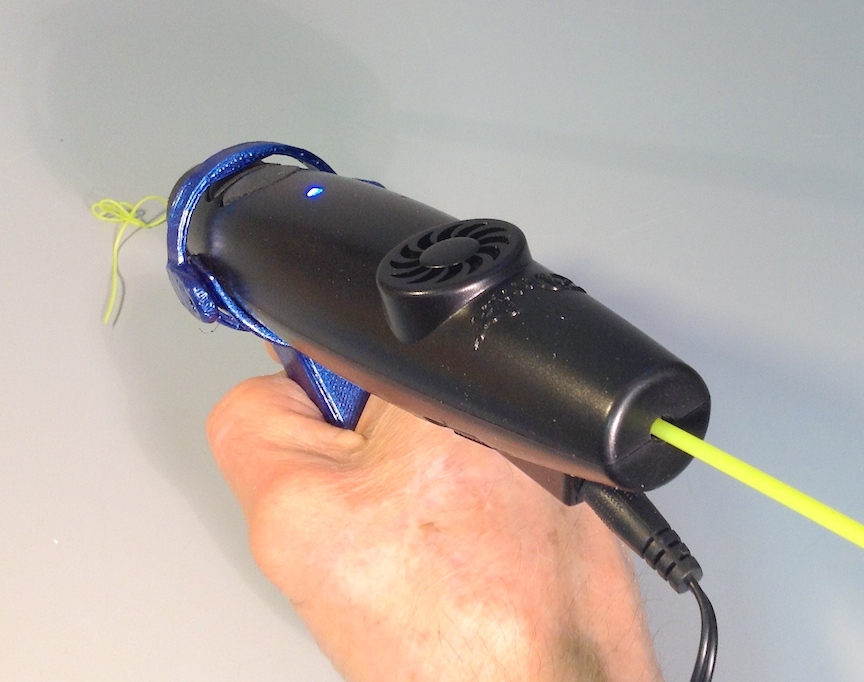
This Phaser Handle makes the 3Doodler look cool (like the Star Trek weapon), but it also makes doodling more comfortable (especially for people with small hands). The makers of the 3Doodler obviously have plans for making a handle, because they provided a handy mounting bracket with threaded holes for M3 screws. But we couldn’t wait!
The handle alone is beneficial, but using the trigger with the handle keeps the hand more relaxed during extended doodling.
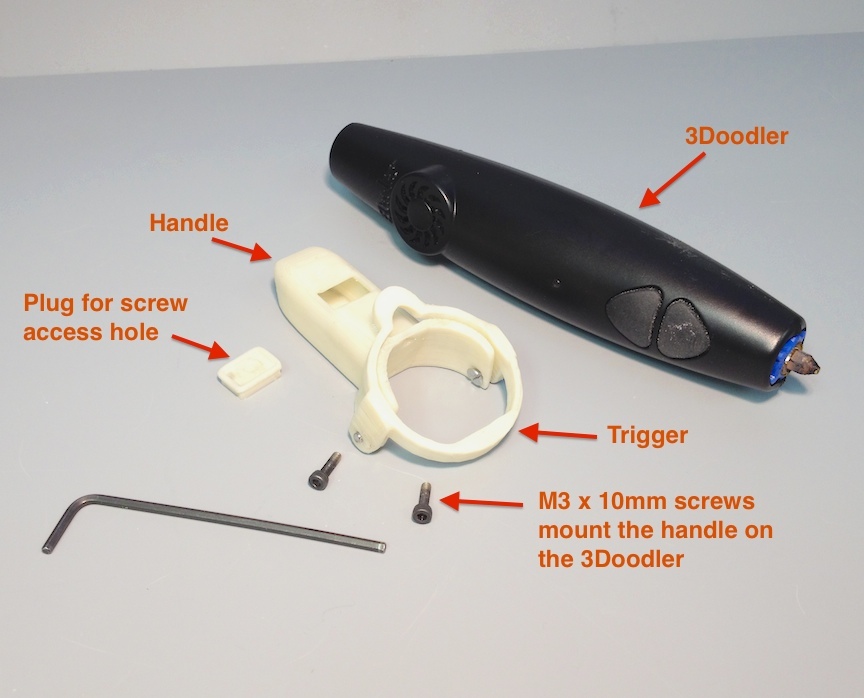
The Phaser Handle is attached to the 3Doodler with a pair of M3 x 10mm screws (any head design). The trigger attaches to the handle with a pair of small flat head screws (such as 6-32 x 3/8 inch or M3 x 6mm) serving as hinge pins. The screws are available at Lowes and Home Depot.
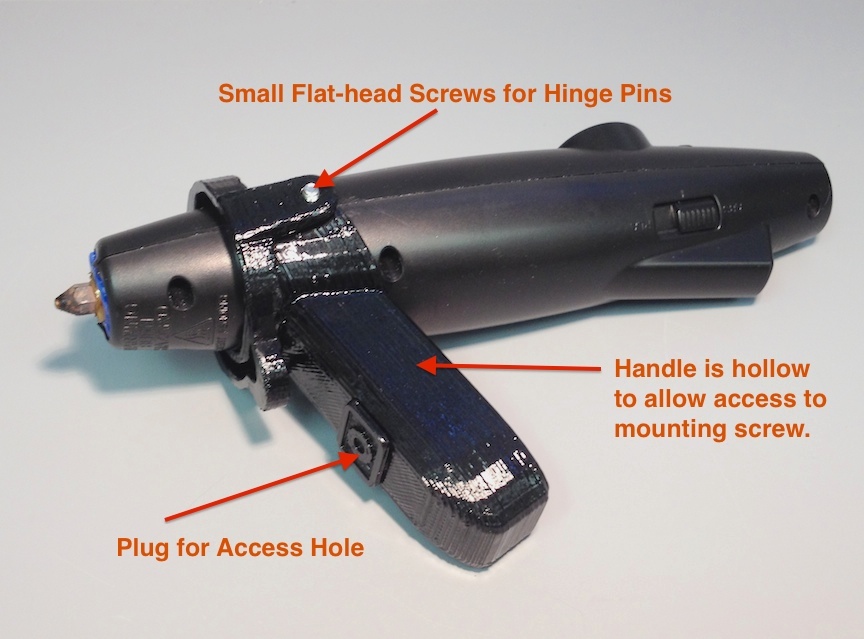
The handle is hollow to allow access to a mounting screw (rather than having an infill of plastic in a sparse honeycomb pattern). If your printer drops a few threads while bridging across the top of the handle, just let it finish the job. Chances are it will recover before the top layer is reached. If it fails, you may have to adjust your slicer settings (such as slowing the speed for bridges) and try again.
In our next blog post, we will show you how to use the 3Doodler itself to update the Phaser Handle. The exercise will be a good demonstration of using the 3Doodler to hack an existing product.
Stay tuned!