We've held the second of our monthly 3D printing meetings recently, with a fifth person getting trained up on how to use our current printer, and are on the cusp of another advancement in our previously-mentioned 3D printing capabilities, now that 3 people have decided which printer design they're going to build next.
In the meantime, we continue to torture Beardicus's poor little Huxley RepRapPro making other little tschotskes that speak to our interests. This doesn't get us closer to the glorious future of 3D printers for everyone, but I like to think of it as our answer to Wall Street's "profit taking": Every once in a while it's nice to just cash out a little bit and enjoy what you've already got.
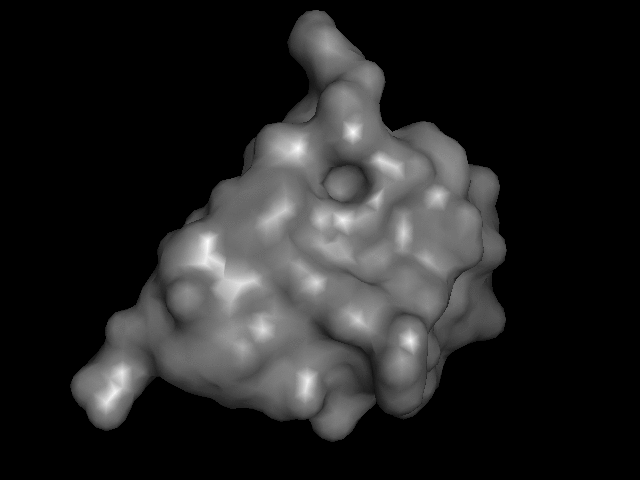
My turn at that most recently was this little model of monomeric insulin, based on the crystal structure reported by Gursky et. al.
The trick is how to take a computer model of something like this:
and print it on the 3D printer so that it goes from being an on-the-screen abstraction to something you can hold.
Consider that there are many different ways to render these things on a screen:

Each has its uses. But learning how to manipulate an on-screen rendering can be a fraught experience. How much better, then, to have the option of turning the model over directly, with your own hands?
With fused deposition printing, the problem is that the irregular surface doesn't really present a good way of getting the nascent object to stick to the print bed.
To start, I trolled through the RCSB web site for a suitable small globular protein that had a bit of name recognition. I picked insulin, and from among the various insulin entries, picked 9INS.
I brought that file up in PyMOL, issued "hide everything" and then "show surface" (or their GUI equivalents) and, with a few other visual tweaks, like setting the color, exported a VRML 2 (.wrl) file. I played around with that in meshlab a bit, exporting it then as an .stl file.
I finally sorted out that what I really needed to do was bring it into Blender and subtract a cube-shaped (well, any volume with a flat face would probably do) volume from the molecule to give a partial rendering of the model with a flat surface. Doing that twice, to generate each "half" of the molecule, leaves me with two .stl files that can be printed flat side down. In some cases, I've brought the file into netfabb's online service for cleanup of manifold errors. Then, I bring each file into ReplicatorG to more easily scale and orient the model. Finally, I bring the .stl files into Slic3r to generate the .g file for taking over to the printer.

This result is a fairly small protein and a fairly small model that was fast to design and print as a proof of concept. Future challenges will be to find ways of dividing up larger models and of larger molecules or multi-molecule assemblies so they can be printed, perhaps printing different chains in different colors, preserving relative scaling between different components and the like.
There are several examples of this sort of thing over at Thingiverse,but I first got the idea from Chris Want at University of Alberta via the PyMOL mailing list several years ago.